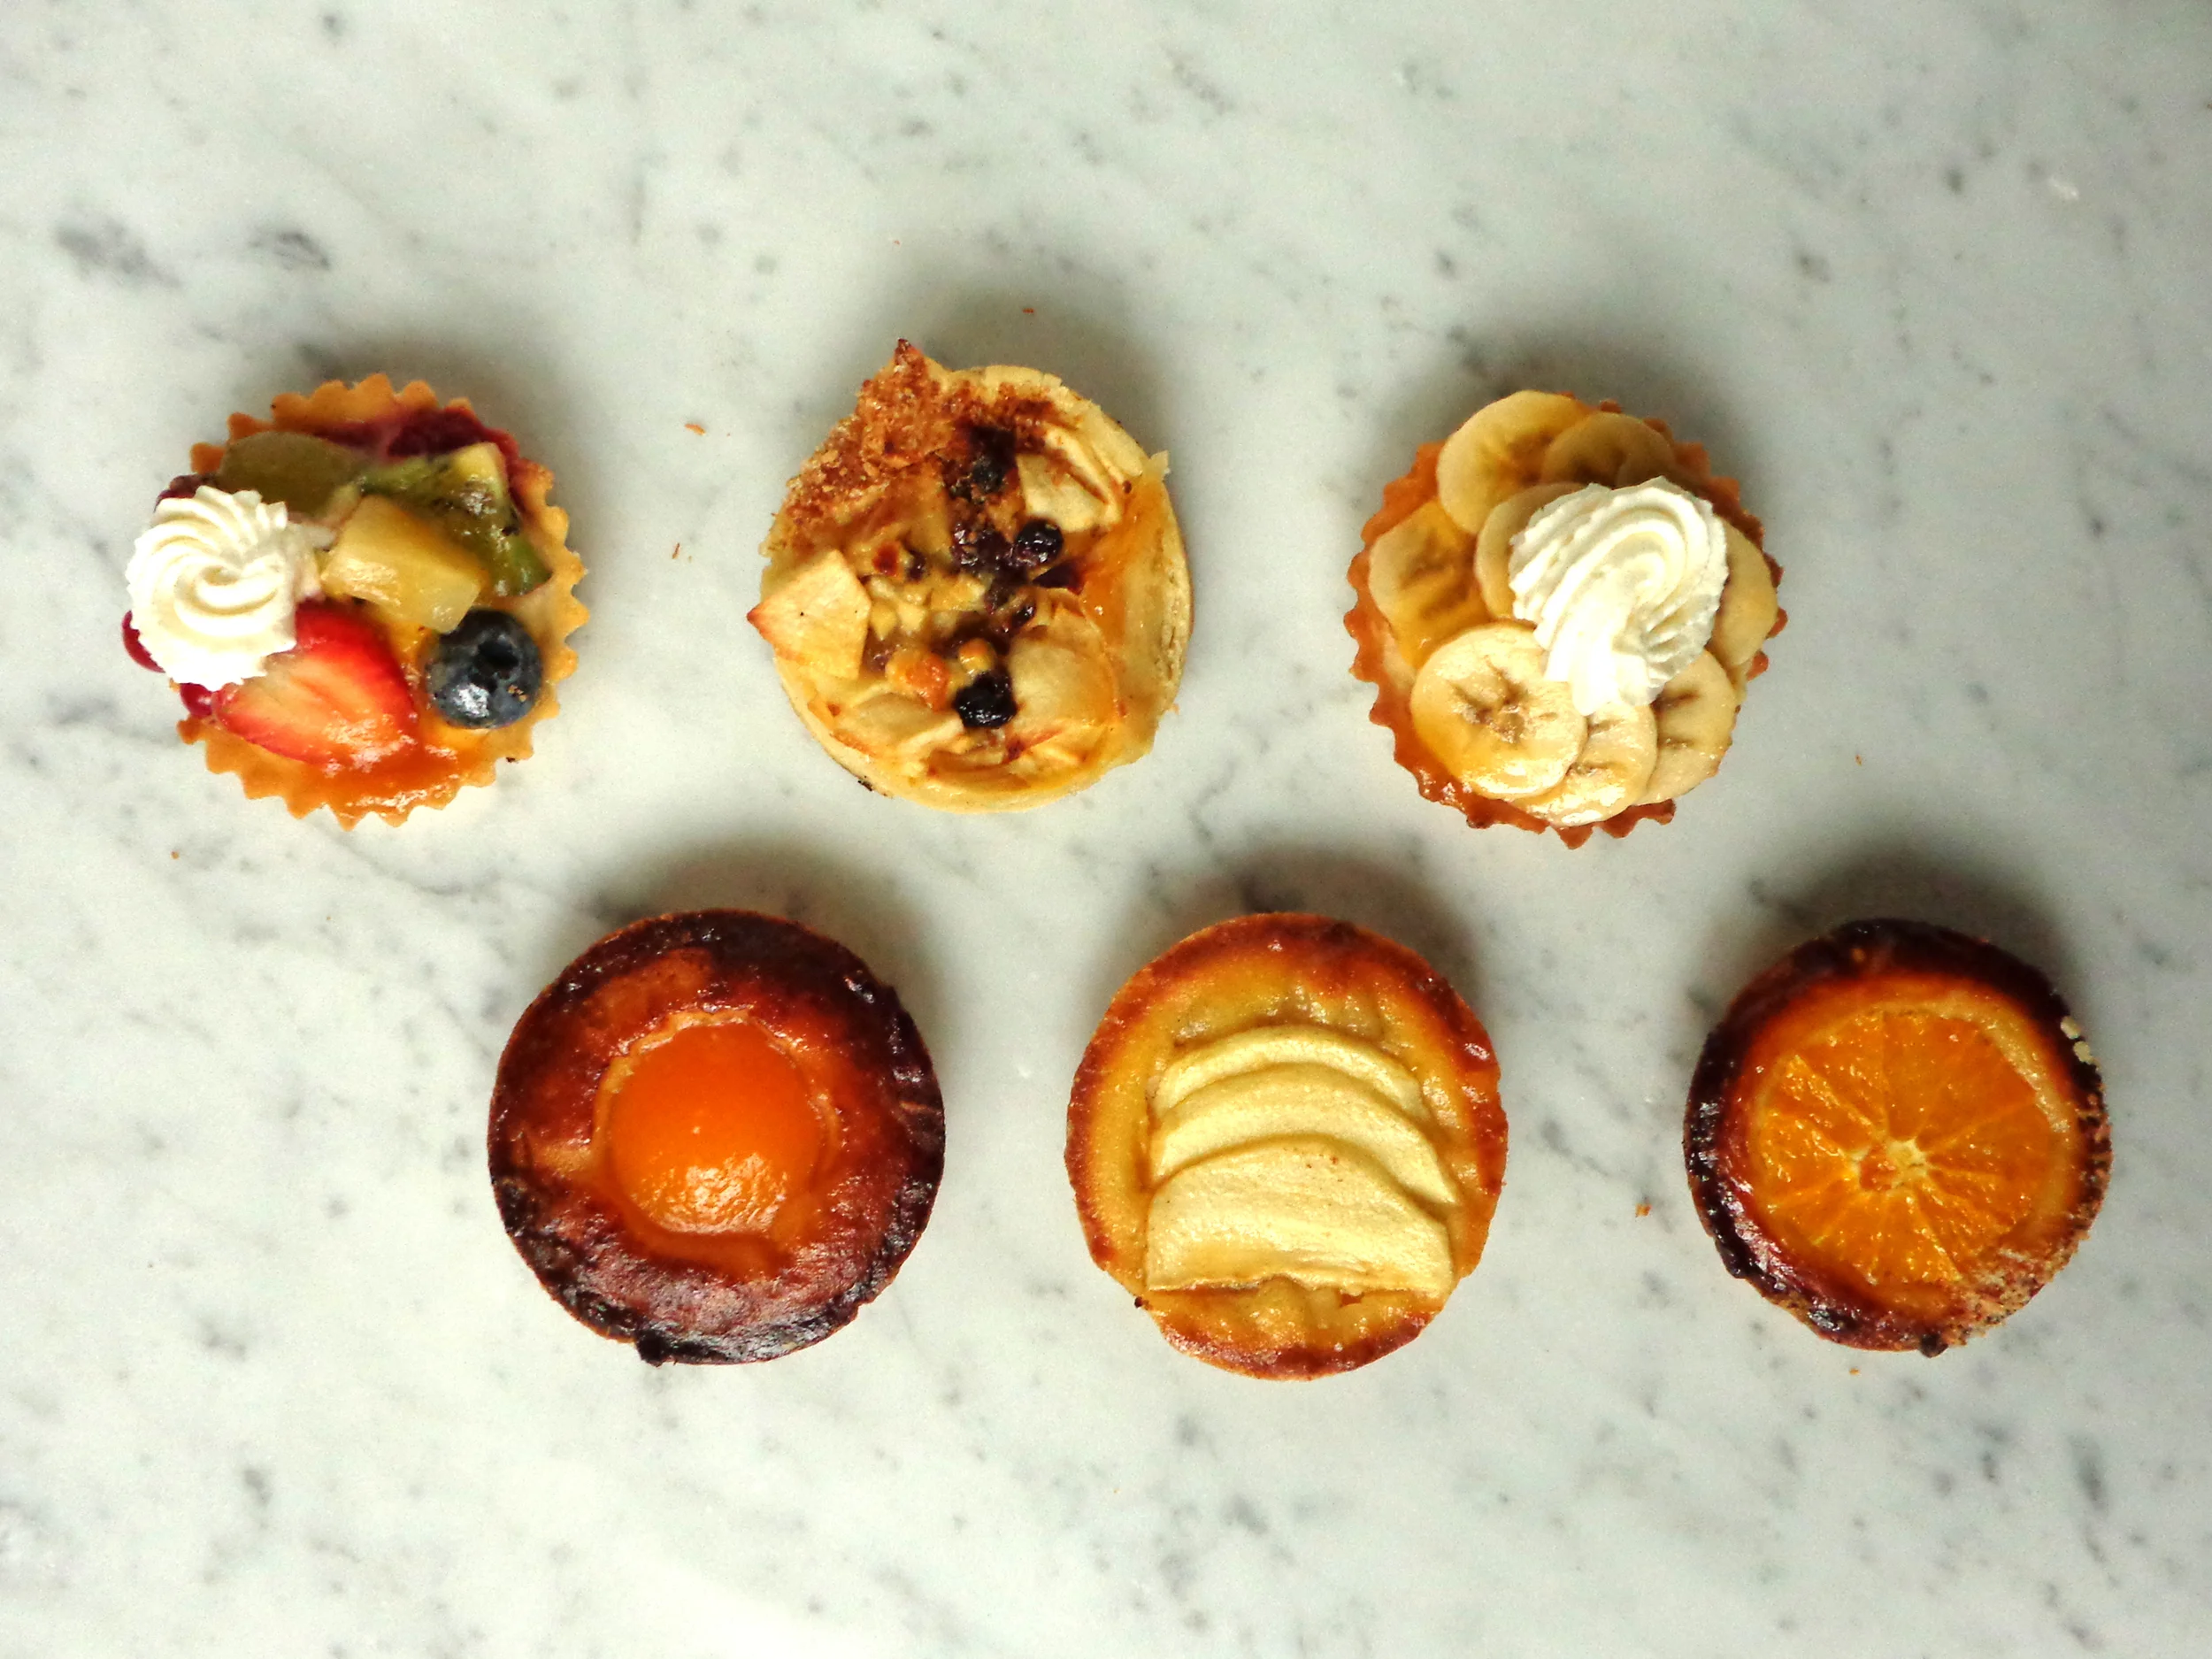
Our teacher Danny likes things small. In earlier classes, he's already tried to convince us that a cookie should be small enough to eat in two simple bites. This week, we made tartlets that seem to go by more or less the same standard. Luckily, though, Danny also likes things in large quantities. Ten different kinds of tartlets, twelve of each. A true tartlet extravaganza.
If only I could say that I made all 120 of those tartlets myself. That would've been really cool.
But no, this was a shared effort - each of us got to choose one kind to make. Usually, when this happens, nobody seems to care all that much about which one they make. This week, however, there were some obvious preferences. Claudia went straight for the miniature banana cream pie and Stephanie basically scooped the honey tartlet I had my eye on from under my nose. I had to be quick to shout out my second choice: a chopped nut tartlet.
Here's the twist, though...
All of these tartlets were made using the same buttery dough as a base. Easy. Once you have that dough, in other words, you can easily play around and experiment with fillings. We used two types of frangipane, a honey-almond caramel, crème patissière, crème surprise and a whole range of different fruits and toppings. The options are endless - just be sure to check whether or not that filling needs to be baked. The banana and fruit tartlets, for instance, which filled with crème patissière or crème surprise, so their shells had to be blind baked and cooled before assembly. All the other fillings, though, baked along with the tarts in the oven.
Oh...and if you're afraid the bottom of your tartlet is going to go soggy after a day or so - don't worry! Just slightly brush the tart shell (before you fill it or after it's been blind baked) with a little bit of apricot jam. It'll seal the dough. Or, you can do what les filles would do with the blind baked shells: brush them with a thin layer of melted chocolate and let it set before filling the shells with cream or crème patissière. Even better.
Now, onto that chopped nut tartlet.
This tiny little thing has two layers of chopped nuts and a 'Dutch paste' filling. The filling is a variation on the classic frangipane, but made with marzipan instead of broyage. It still has some chunks of marzipan in it, so it's a bit stronger in flavor. (A word of warning before you start making these tarts: I'm not entirely sure about the ratio between the recipes for base and filling, so forgive me if you end up with too much of one of these components. Both should freeze well, though, so you can just wrap it up and keep it on hand for the next time.)
mini nut tartlets
recipe from baking class (syntra west)
for the crust
150 gr unsalted butter
150 gr granulated sugar
50 gr eggs (1 large egg)
300 gr all-purpose flour
for the 'Dutch paste'
100 gr butter or margarine
250 gr baker's marzipan (also known as 50% marzipan or 1/1 marzipan)
150 gr eggs (3 large eggs)
85 gr all-purpose flour
to assemble
a variety of nuts, chopped
apricot jam
apricot jelfix (optional)
how to
for the crust
1. The base is a simple butter dough that is made either by hand or by using the dough hook on your electric mixer. You start by kneading and softening the butter and then add the sugar. Continue to knead until the sugar is distributed across the butter and then add the egg. Once you've incorporated the egg, add the flour and knead until it is just incorporated. Don't overwork it.
2. Shape the dough into a log or ball, wrap it in cling film and allow it to rest in the fridge for at least an hour. It's even better if you prepare the dough a day before.
for the 'dutch paste'
1. The 'Dutch paste' is best made in an electric stand mixer fit with the paddle attachment, but can also be done by hand, using a wooden spoon. Again, start by softening the butter. Then add small chunks of the marzipan, followed by an egg and again some chunks of the marzipan. Continue in this fashion until you've used up both the marzipan and the eggs. If, at one point, it doesn't look as if it's coming together well, you may have added the eggs too quickly. You can add some of the flour to pull it back together. At the end, add all of the flour at once and mix until incorporated.
to assemble
1. Take out the dough for the crust and knead it a little just to soften it. On a lightly floured work surface, roll out the dough to a thickness of ca. 2-3 mm and line your tartlet tins with it. Roll your rolling pin over the edges of the tins to get a clean edge.
2. Use a fork to puncture some holes in the bottom of the dough and lightly brush it with apricot jam. Sprinkle a layer of the chopped nuts into the tarts and fill them with the 'Dutch paste'. Make sure that the filling does not tower over the shell. It should be slightly indented in the middle. Sprinkle with more chopped nuts.
3. Collect the tartlet pans onto a baking sheet and bake them in a 180˚C oven. Mine were in the oven for about 15 minutes, but it all depends on the size of your tartlets and the temperature of the oven. If you're unsure about the bake, take one tartlet out of its tin and take a look at the bottom of the pastry. It should be golden.
4. Finish the cooled tartlets with a layer of apricot jelfix. (optional)

